Learn how to seamlessly record and manage InSpace sessions within your Canvas LMS, including tips for recording on an unstable internet connection.
InSpace + Canvas make a great pair! Instructors and students can easily find and share session recordings without using 3rd party applications. Share, save, and download recordings, all from within your LMS.
Start an InSpace recording:
- Start an InSpace session. Recording is available in single spaces, the Auditorium, and the Conference Space.
- Click the record button on the host toolbar on the left hand side.
- A notification will appear, prompting the host to select the InSpace browser tab to record. Hosts can also choose to create a transcript of their video recording in this window.
- A browser popup appears. Users should select the browser tab labeled 'Select this for recording'. This is necessary because it tells the web browser which tab to "share" with the InSpace recording feature.
- After clicking 'Share', all participants will see a notification that recording has begun.
While recording a session:
- Everything the host hears and sees will be recorded, with the ability to Pause and Resume the recording.
- Multiple hosts can record simultaneously during a session.
- Hosts can record in all room configurations (Discussion Room, Presentation Room, Breakout Rooms, No Rooms) and can change the layout anytime during the recording session.
- Note: In Firefox, recording is supported only in the discussion and presentation rooms.
Stop an InSpace recording:
- Click the recording button again in the host menu.
- In the popup window, press the square 'stop' button.
- A new popup will appear. Rename the recording if needed, then select 'Stop and save'.
-
Once recording ends, a notification on your screen indicates that the recording has been saved to the Canvas LMS. Note: Videos take approximately 1 hour to process before they are available for viewing and downloading.
Manage InSpace recordings in Canvas:
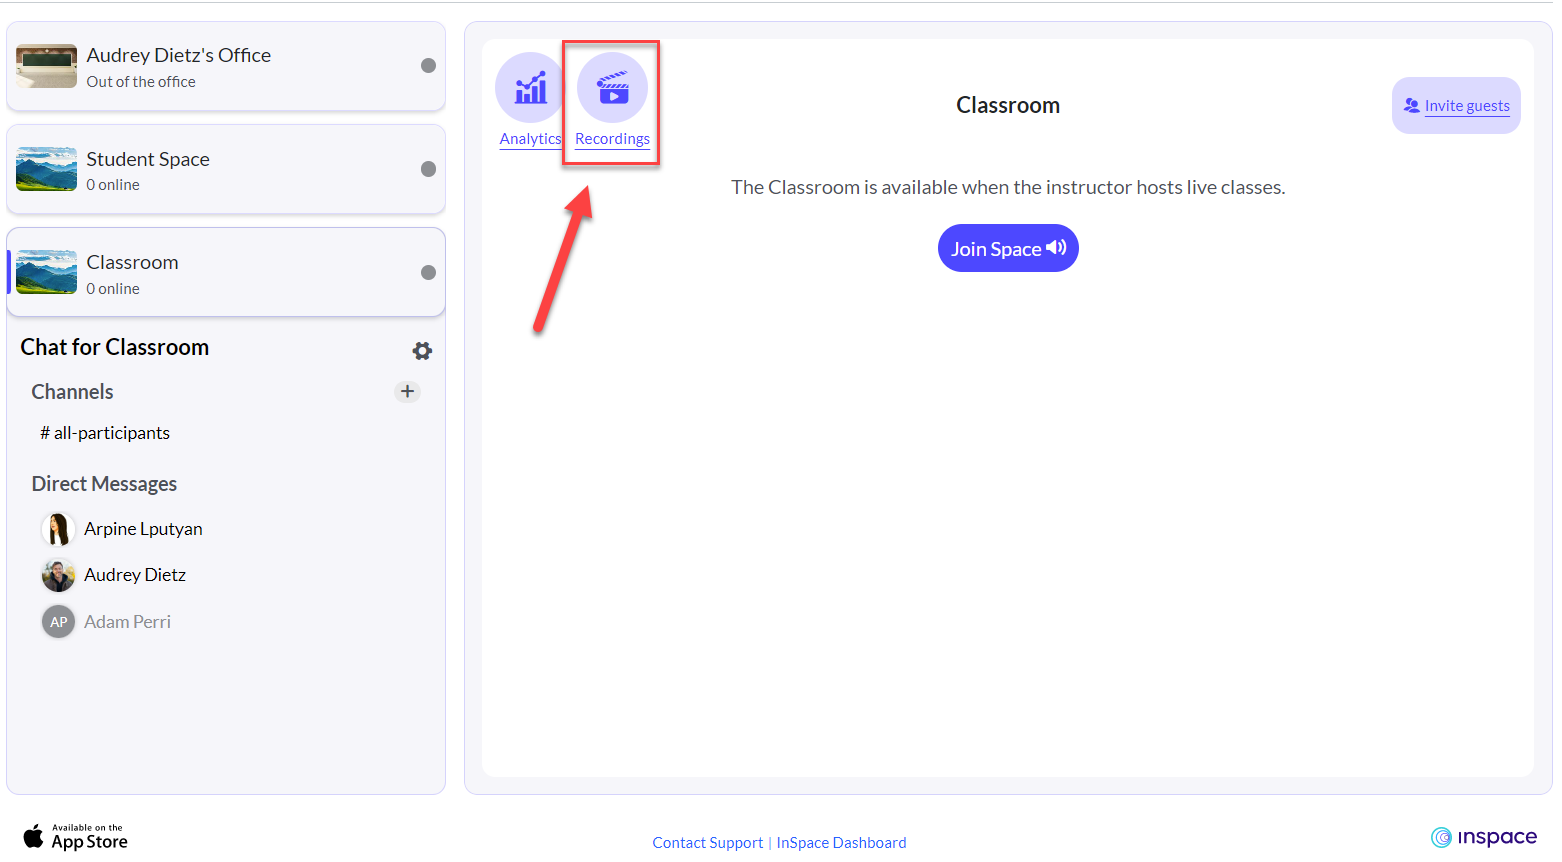
- To manage InSpace recordings, open the Canvas LMS InSpace portal, select the session (Classroom, Student Space, or Office), then click the video 'Recordings' icon.
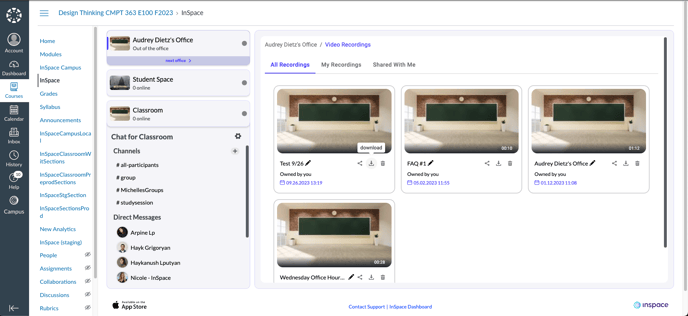
- This will display your recorded videos, as well as any recordings shared with you.
- You can download and share any video on your dashboard, and you can edit or delete videos you have created.
- First, click on the Space card where you created your recordings. Then, click the Recordings icon.

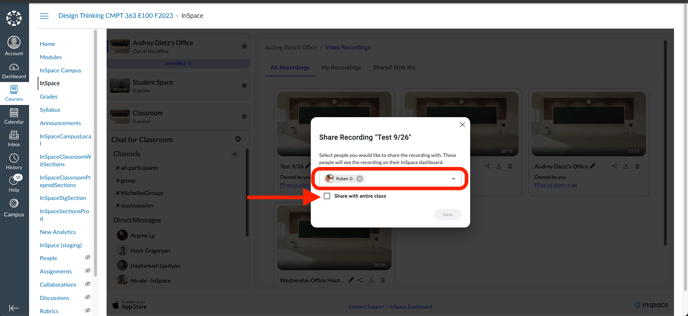
5. Next, share your recording with your class or an individual by clicking the Share icon. Choose 'Share with Entire Class' to automatically share the recording with everyone enrolled in your course, or select individual names to share with only a few people.

6. To download a recording from Canvas, click the Download button. You will see the option to download the MP3 video file and the VTT transcript file.

Recording on an unstable Internet connection:
Hosts can download the recording right after finishing the recording.
- If a host’s Internet network quality is unstable while recording, we’ve implemented improvements to preserve their recording data and quality.
- After finishing the recording, hosts will receive a notification that they need to keep their InSpace page open so the saving process finishes.
- If a host doesn't keep their page open while the recording saves, their recording may experience some quality issues due to their poor network quality.
- If a host closes their InSpace tab but later reopens it, the saving process will continue.
