Learn how to easily record and download the audio transcript file of your InSpace session with this step-by-step guide.
Creating a downloadable recording transcript of your InSpace session takes only one click.
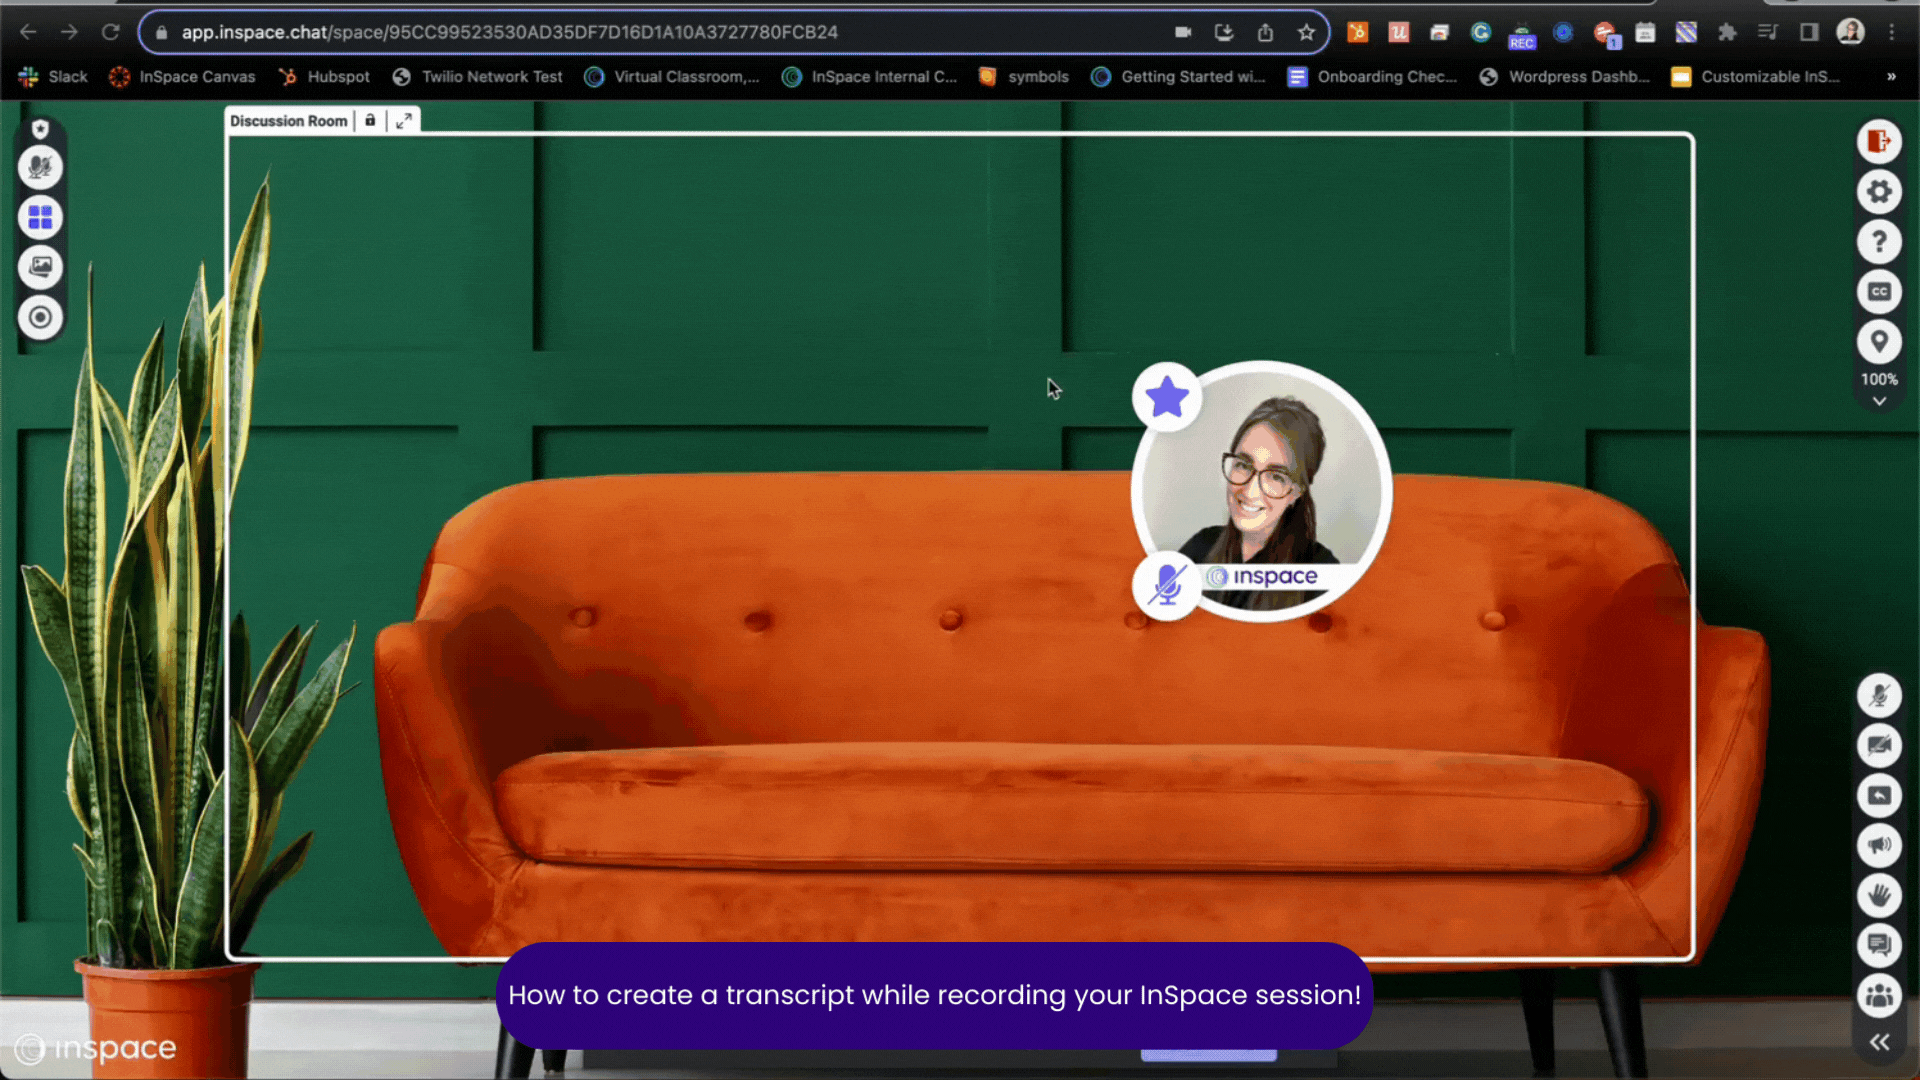
InSpace offers automatic closed captioning. Separately, InSpace hosts can also record InSpace sessions and create an audio transcript file that can be downloaded after the session. Here's how.
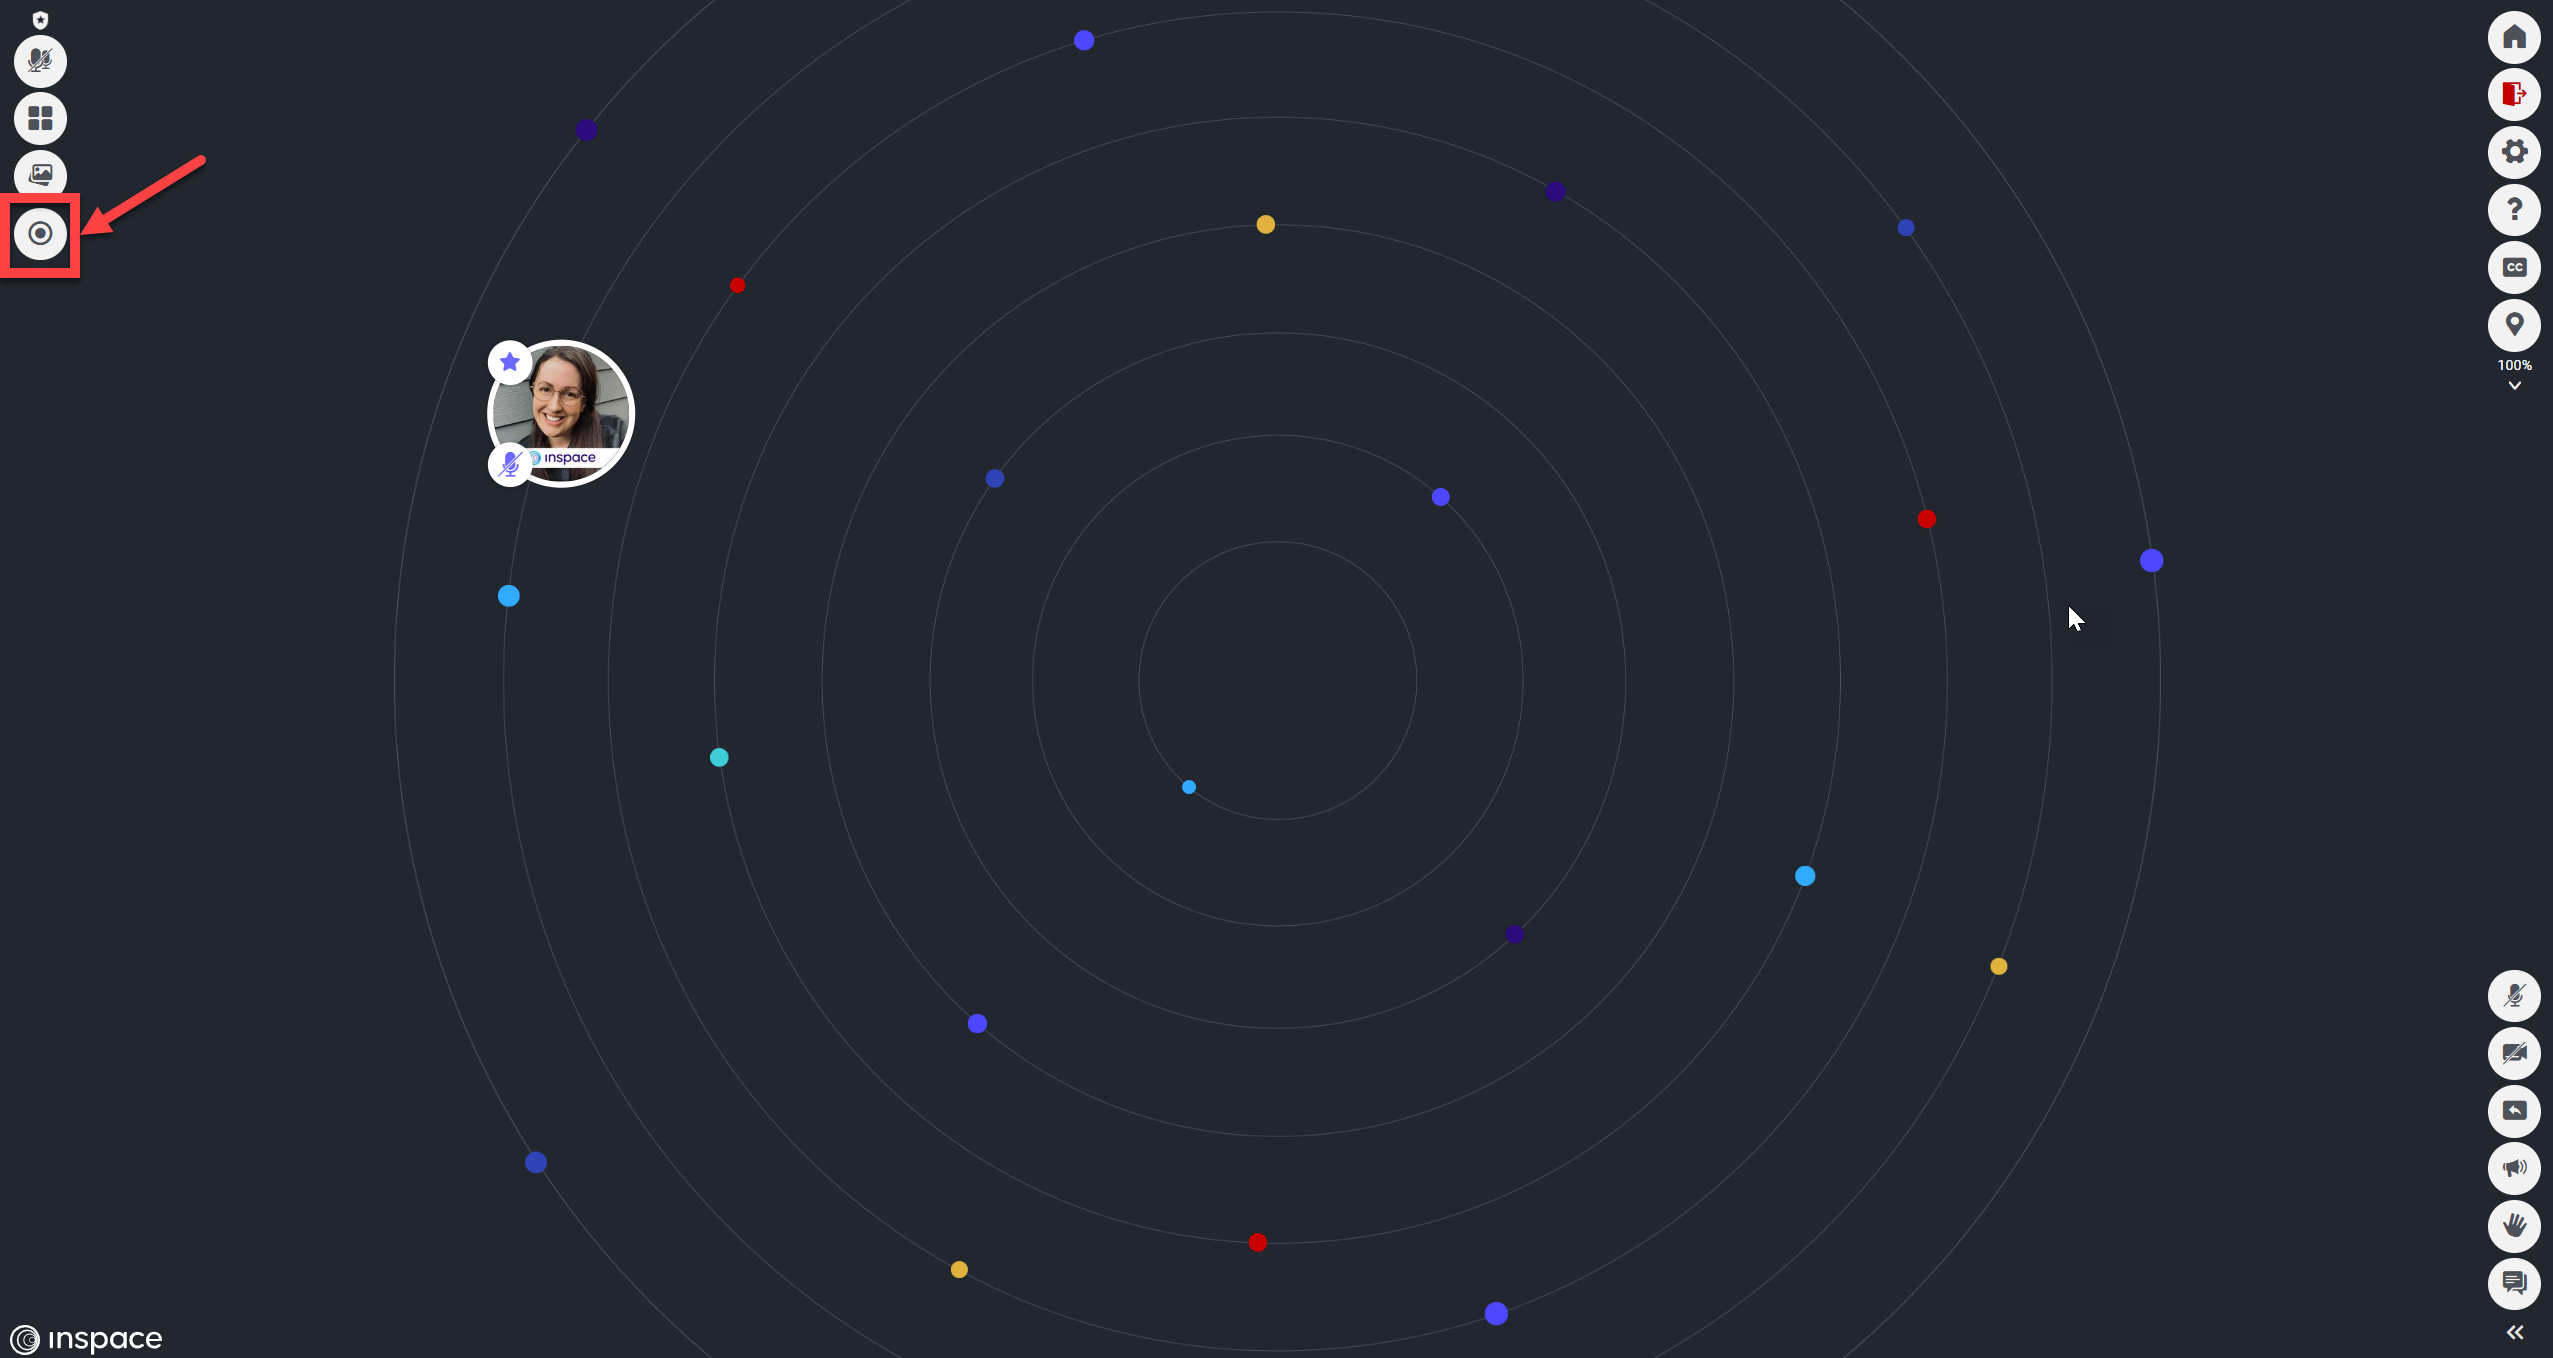
1. Start a recording by clicking the Record button on the left side of the Host Toolbar. Remember, only paid Hosts can record an InSpace session.
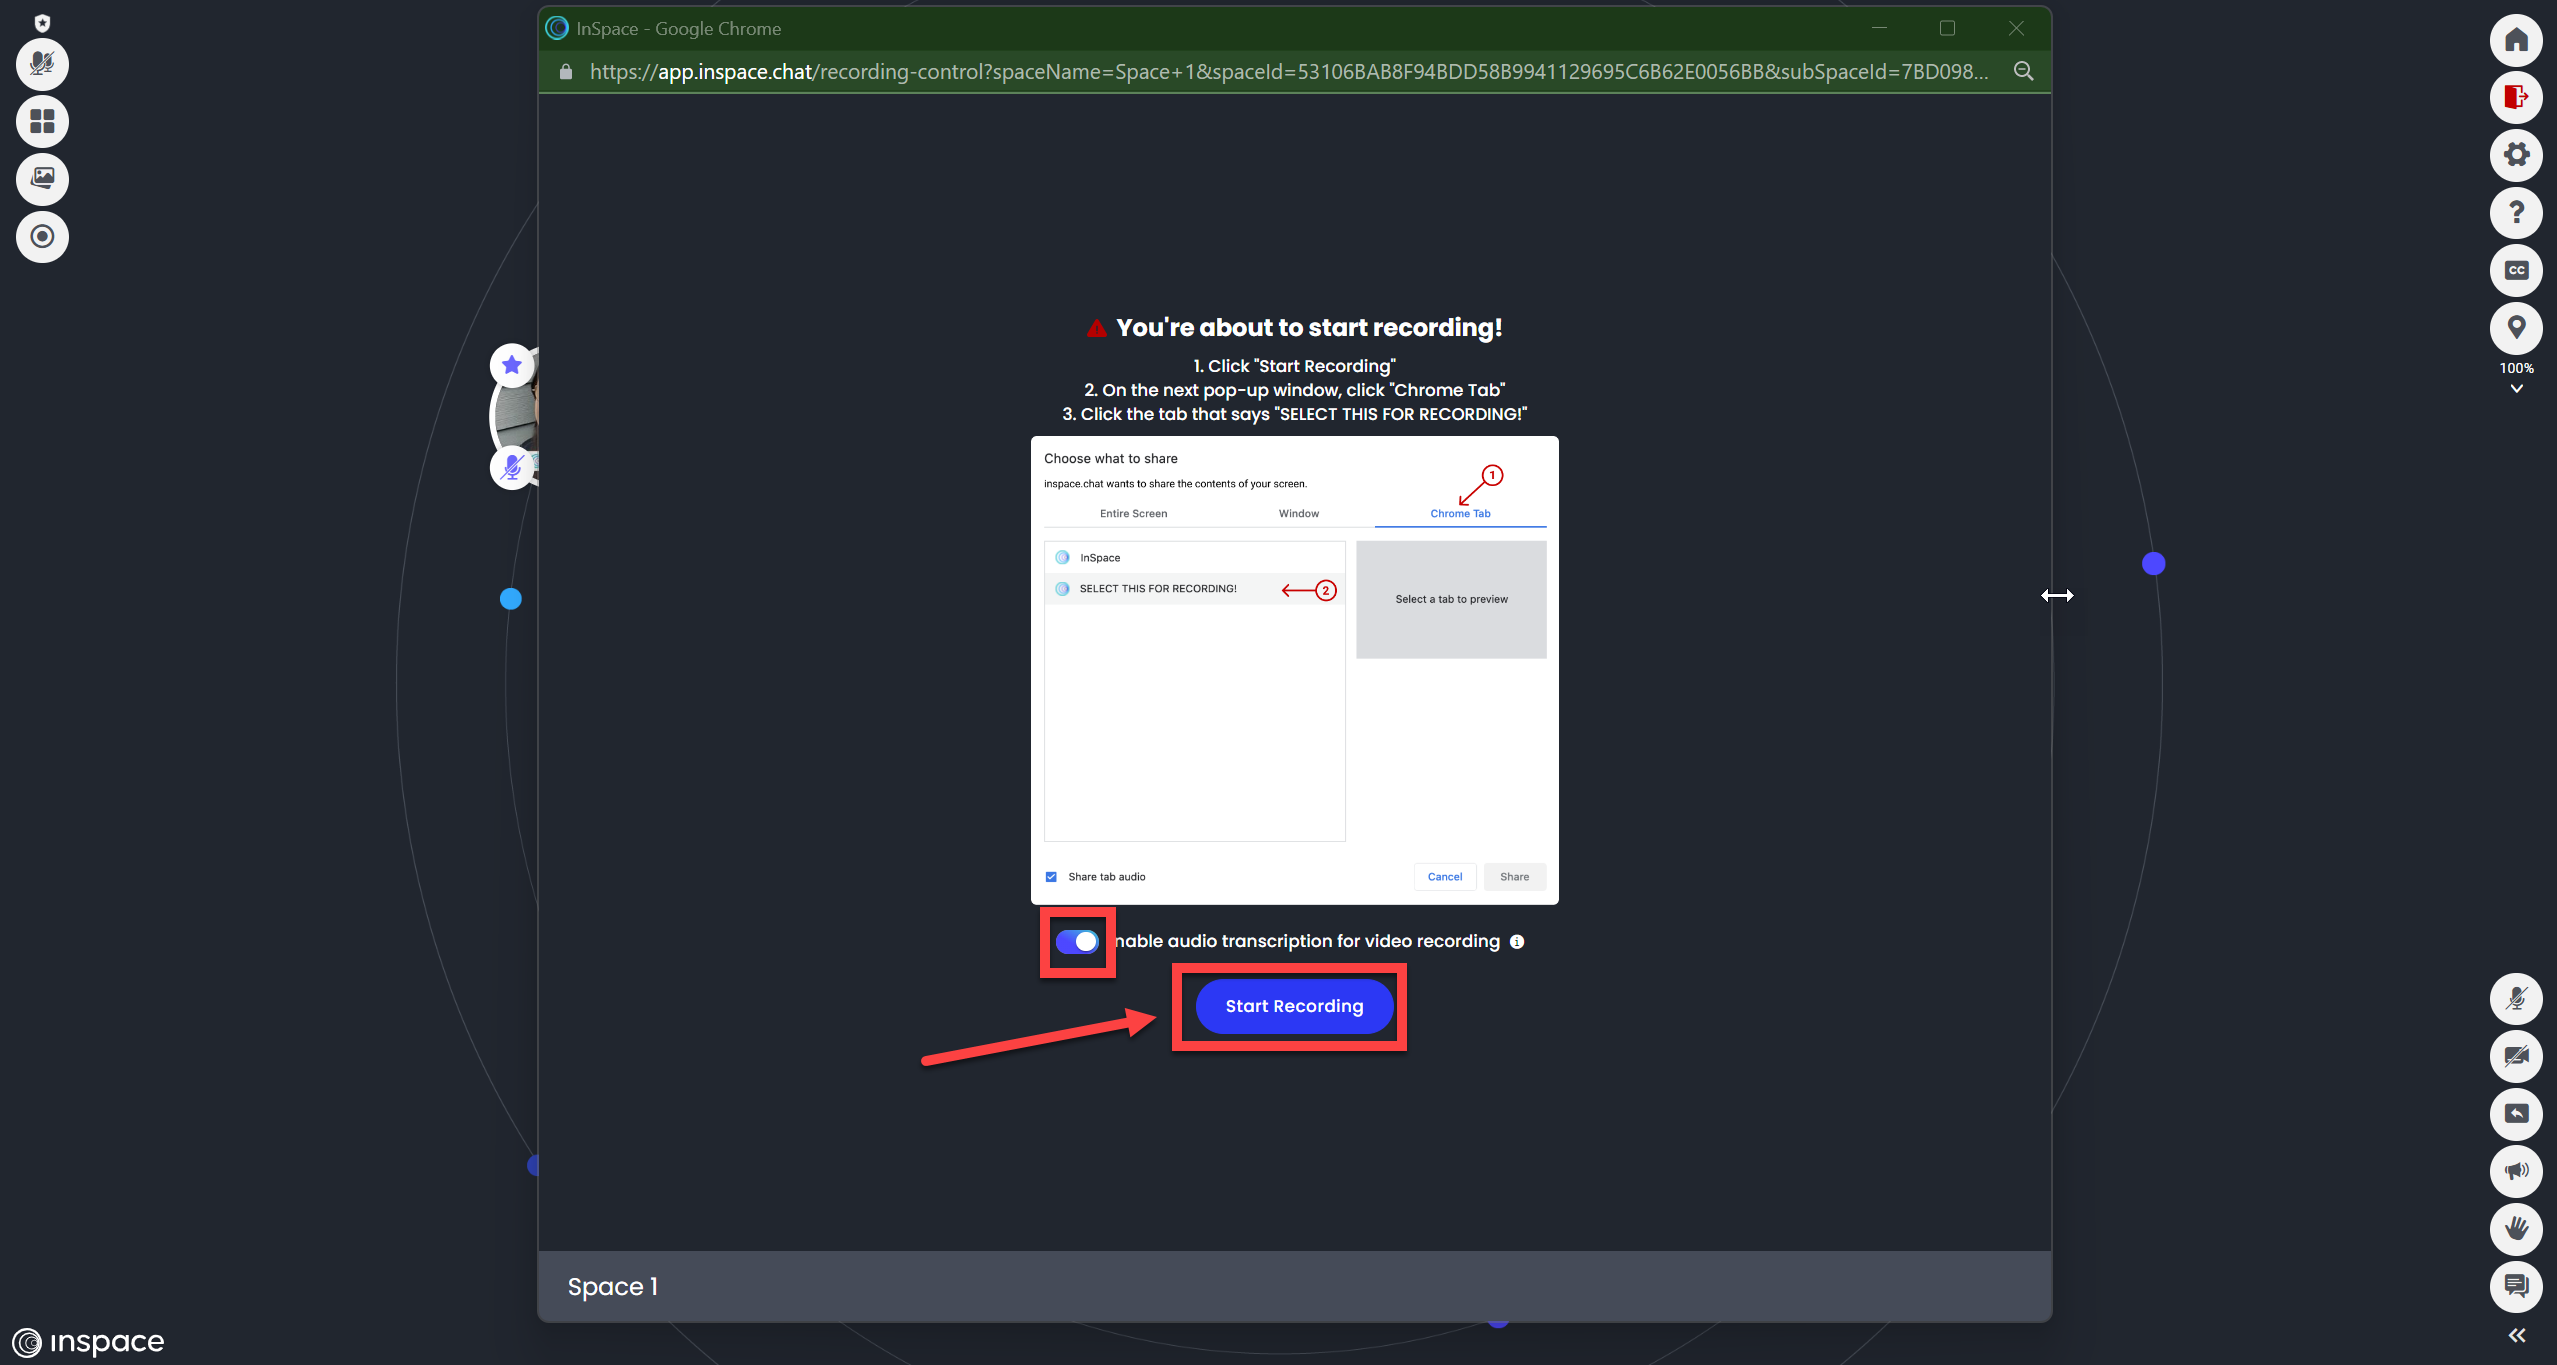
2. The Recording window will open in a separate pop-up. Locate the Audio Transcript toggle before starting the recording. As of August 1, 2023, this toggle is turned ON to automatically create transcripts as you record your sessions. Check that the toggle is ON and colored blue before pressing the purple Start Recording button. Make sure the toggle is ON and colored blue before pressing the purple Start Recording button.
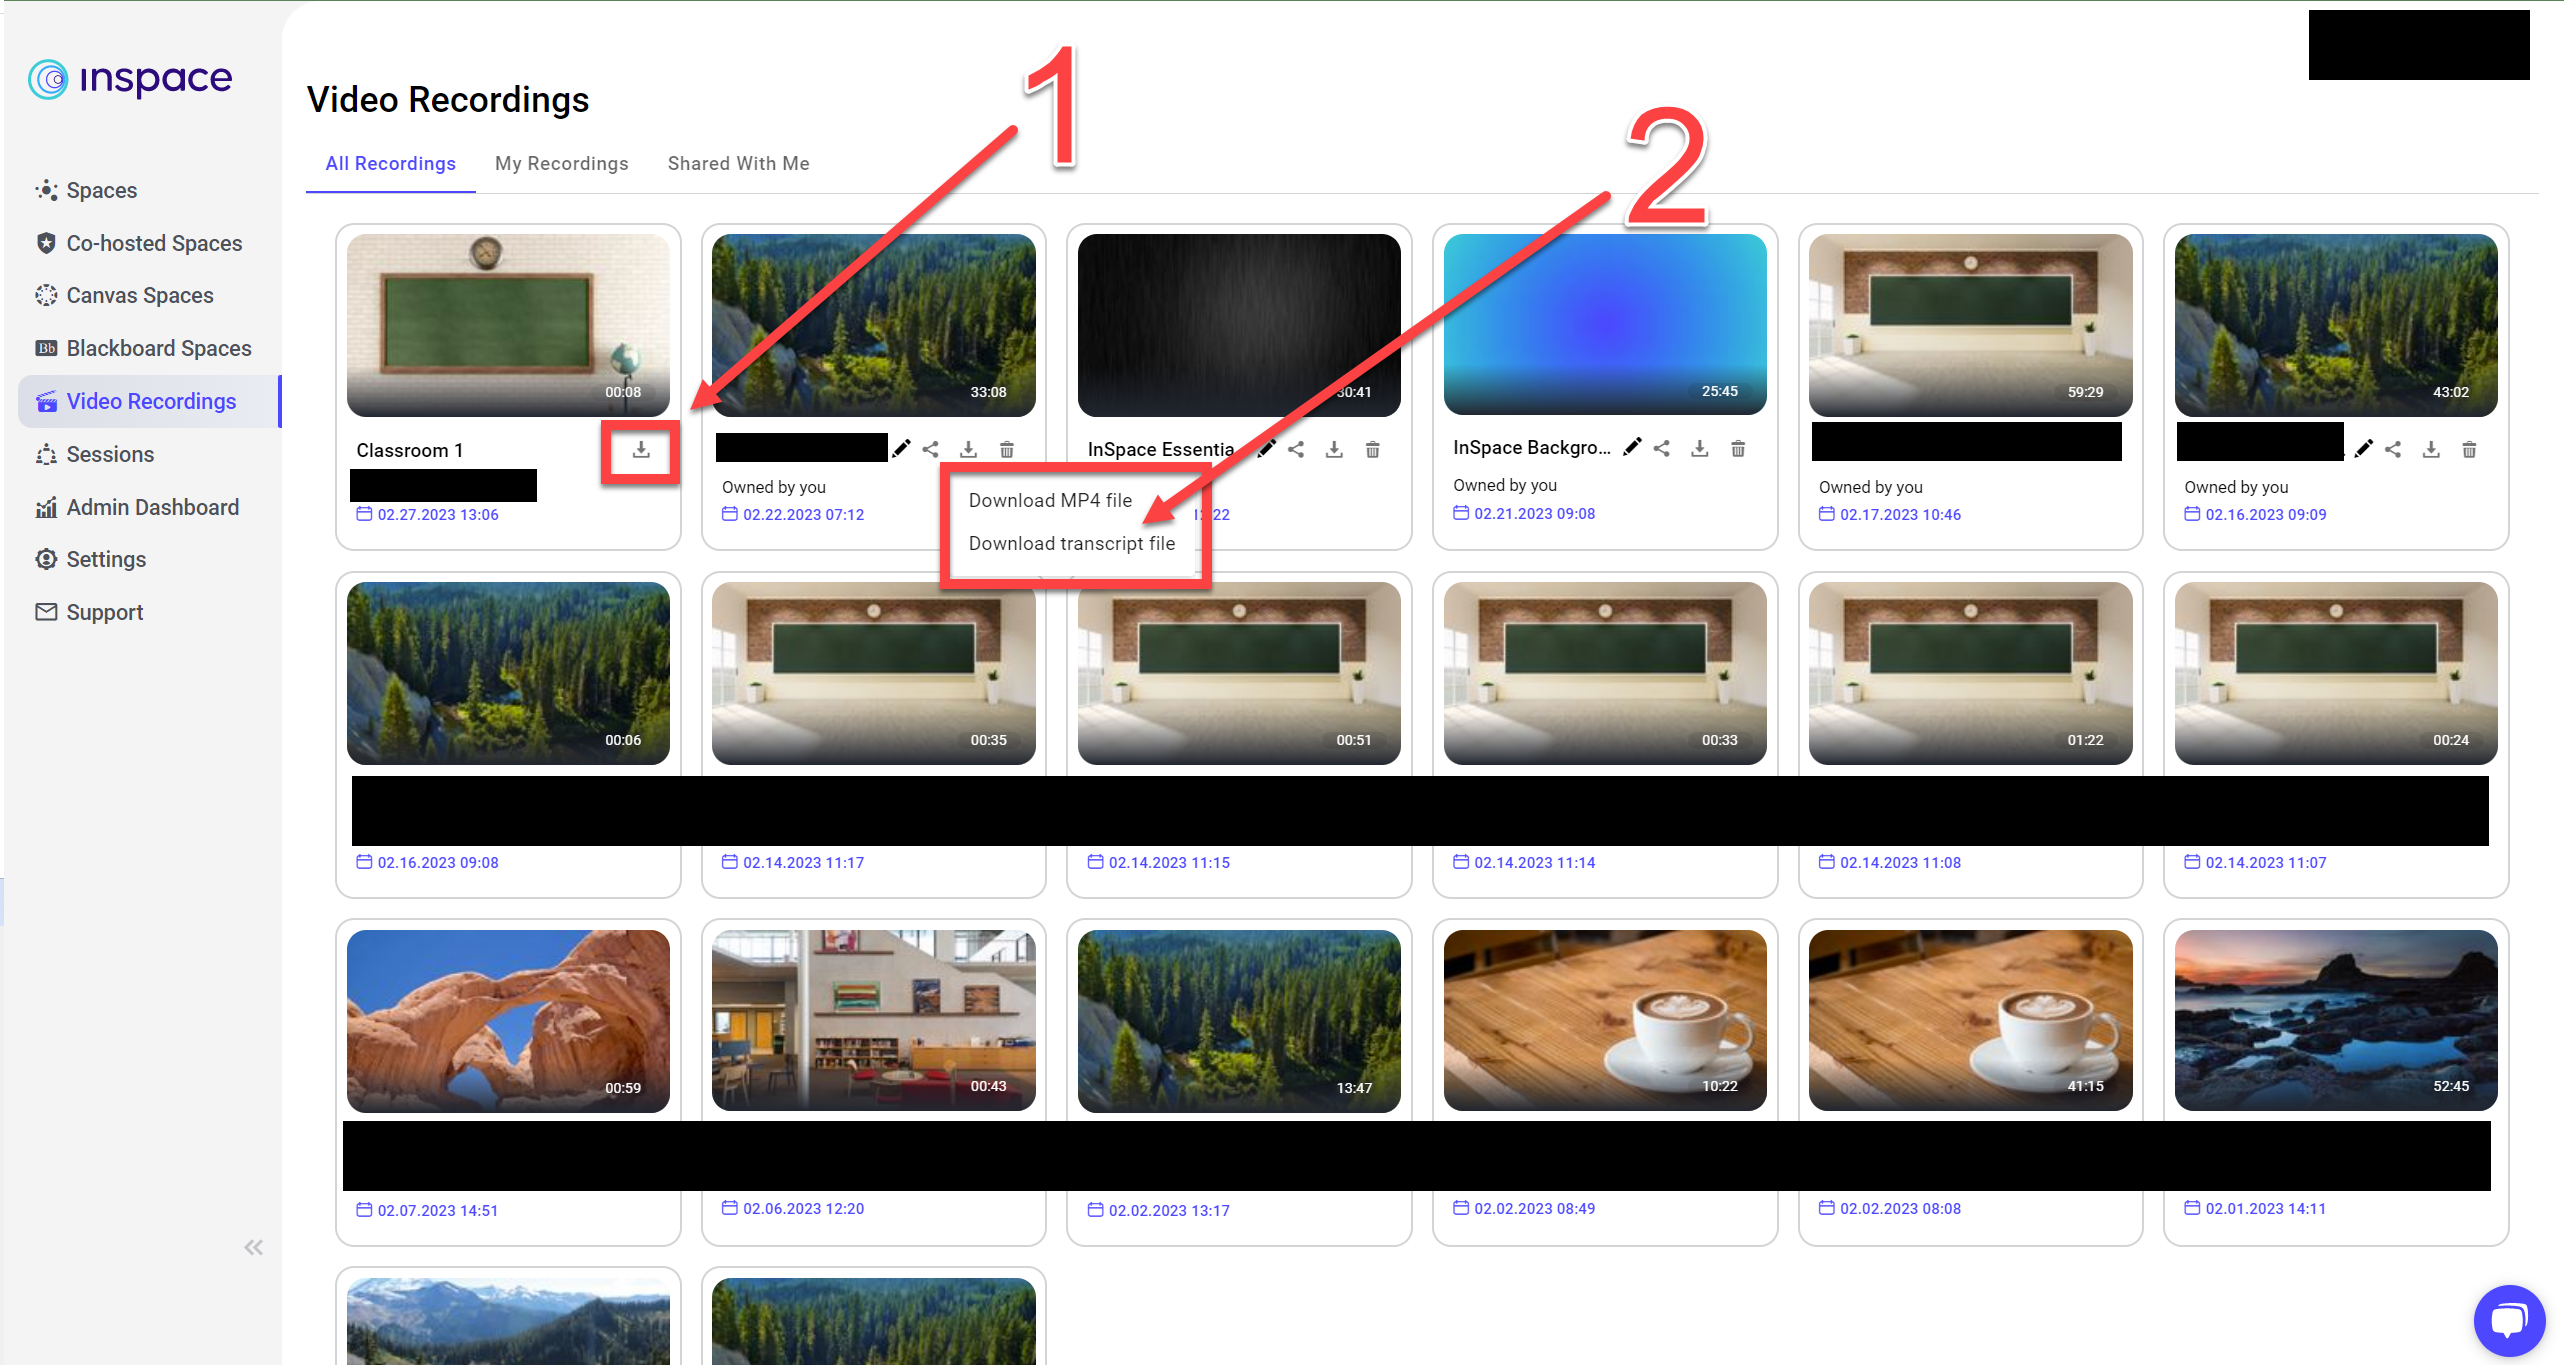
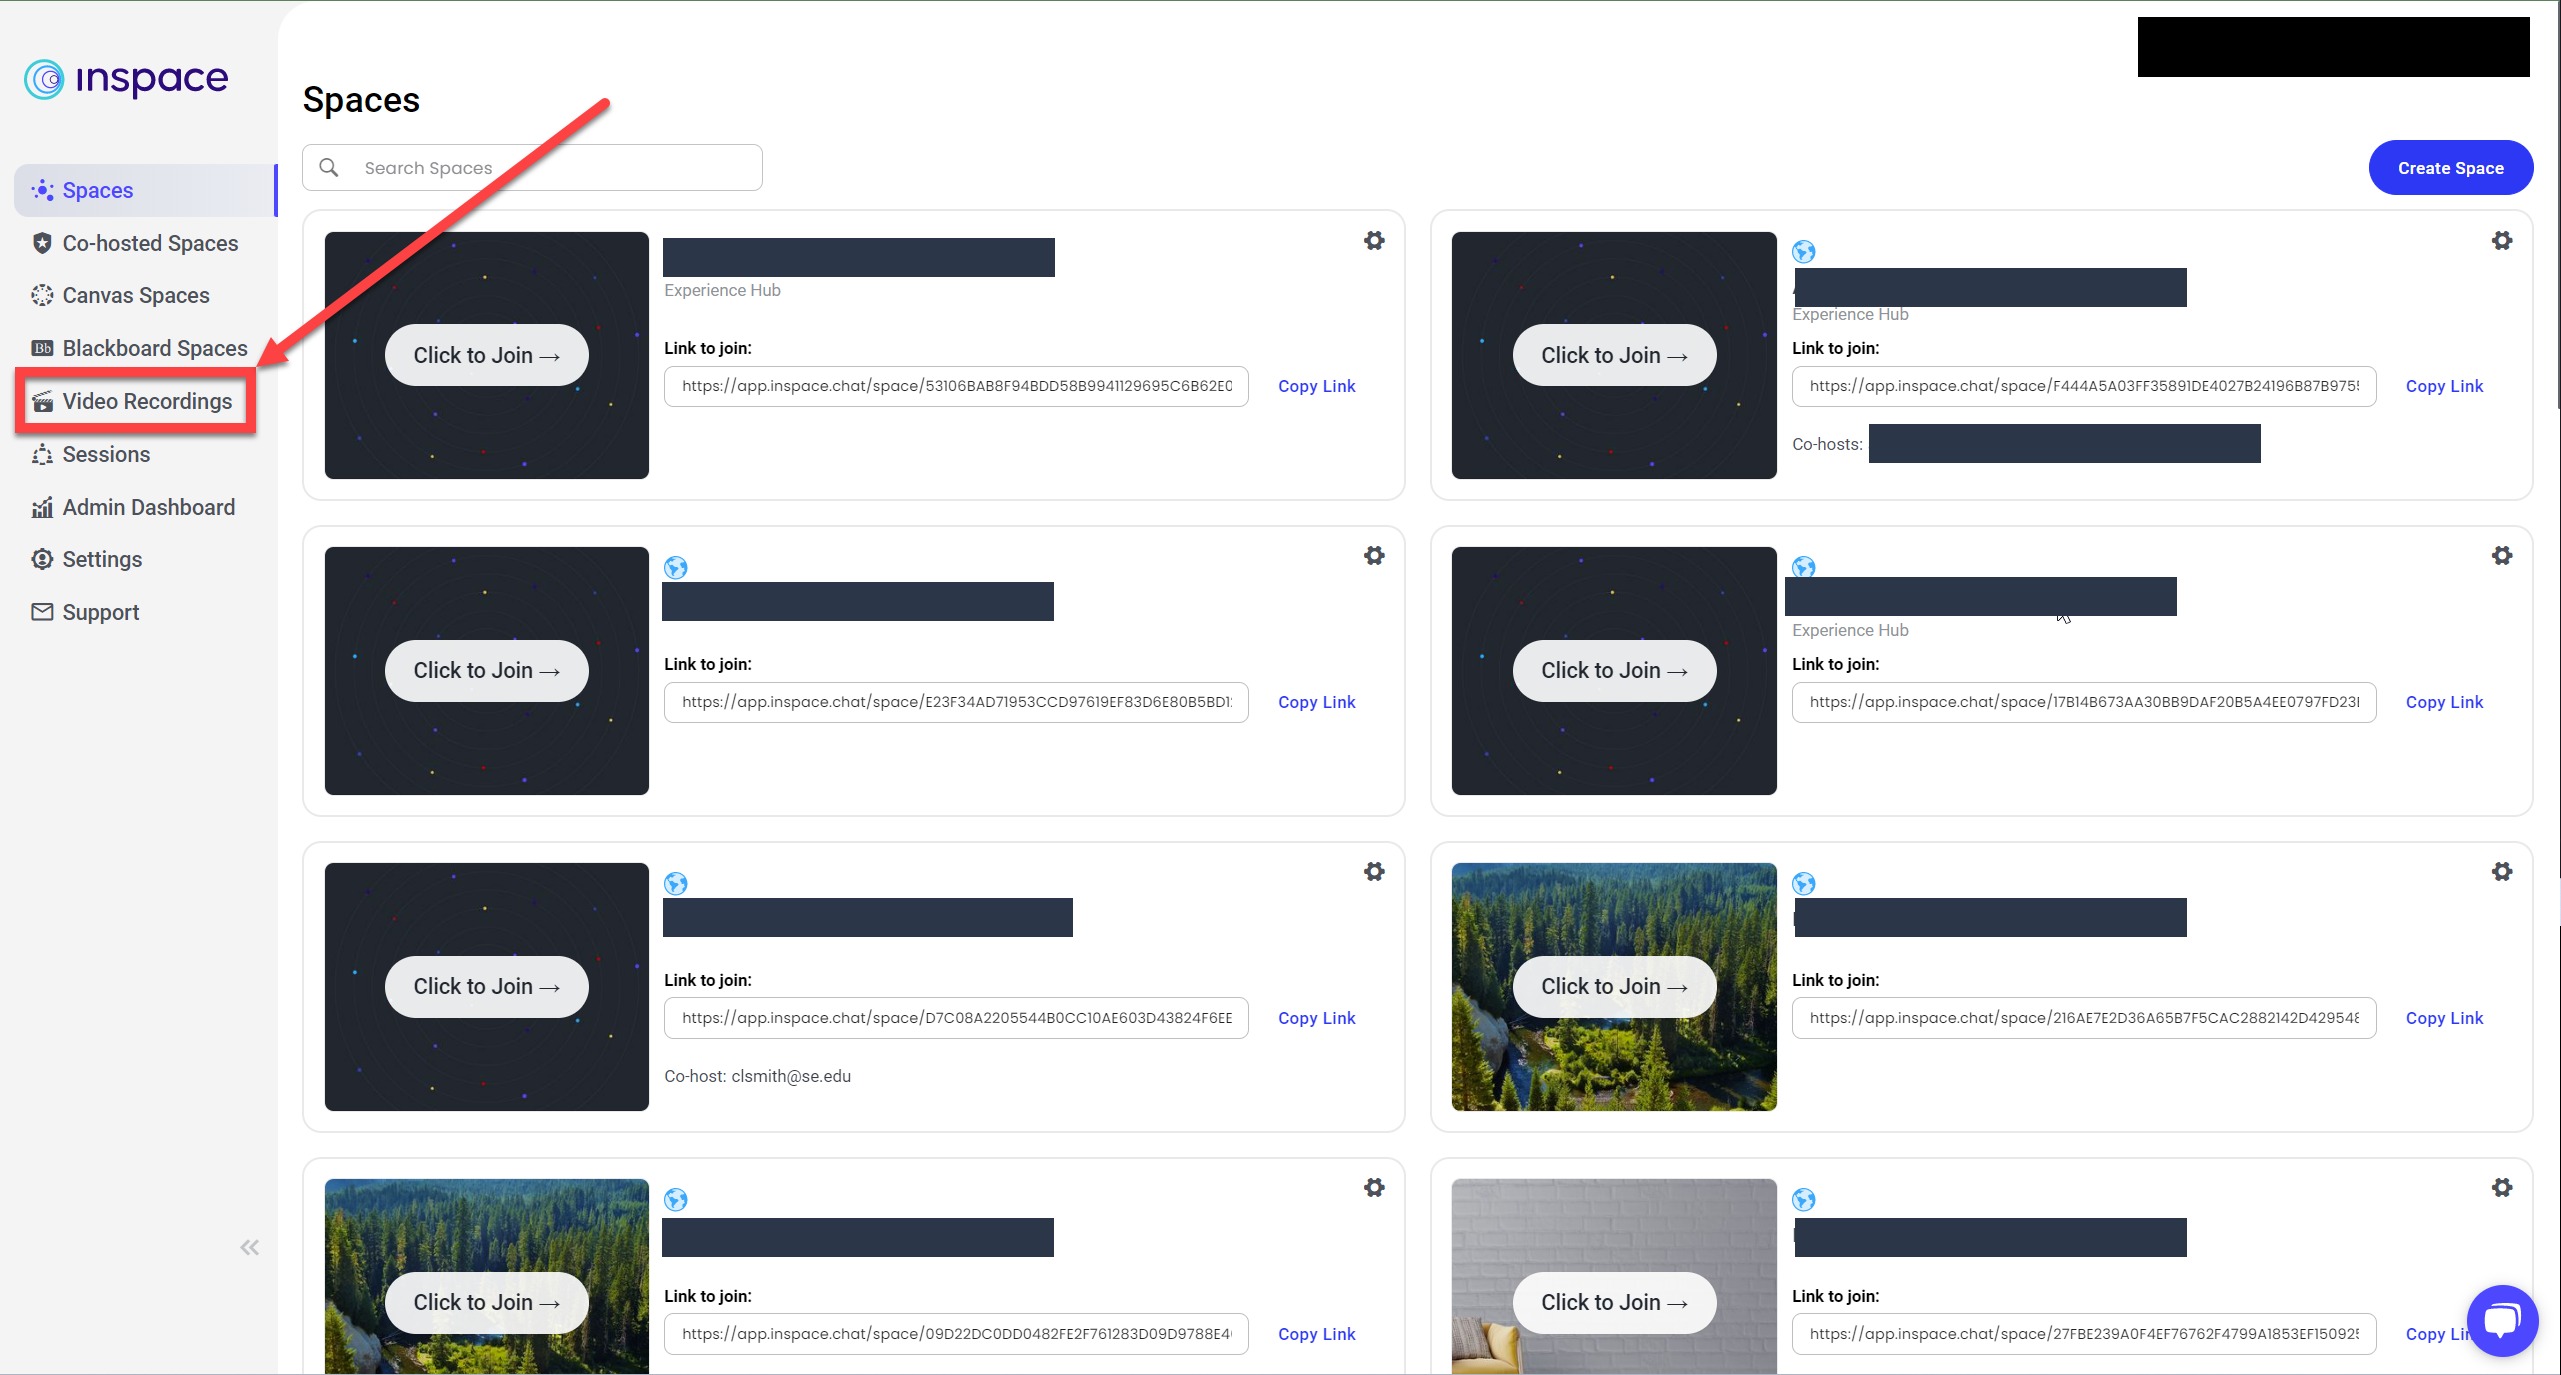
3a. After the session has ended, your recording and transcript will save to the Dashboard. Click the Video Recordings tab on the dashboard's left side to see all your recordings in the Recordings Library.
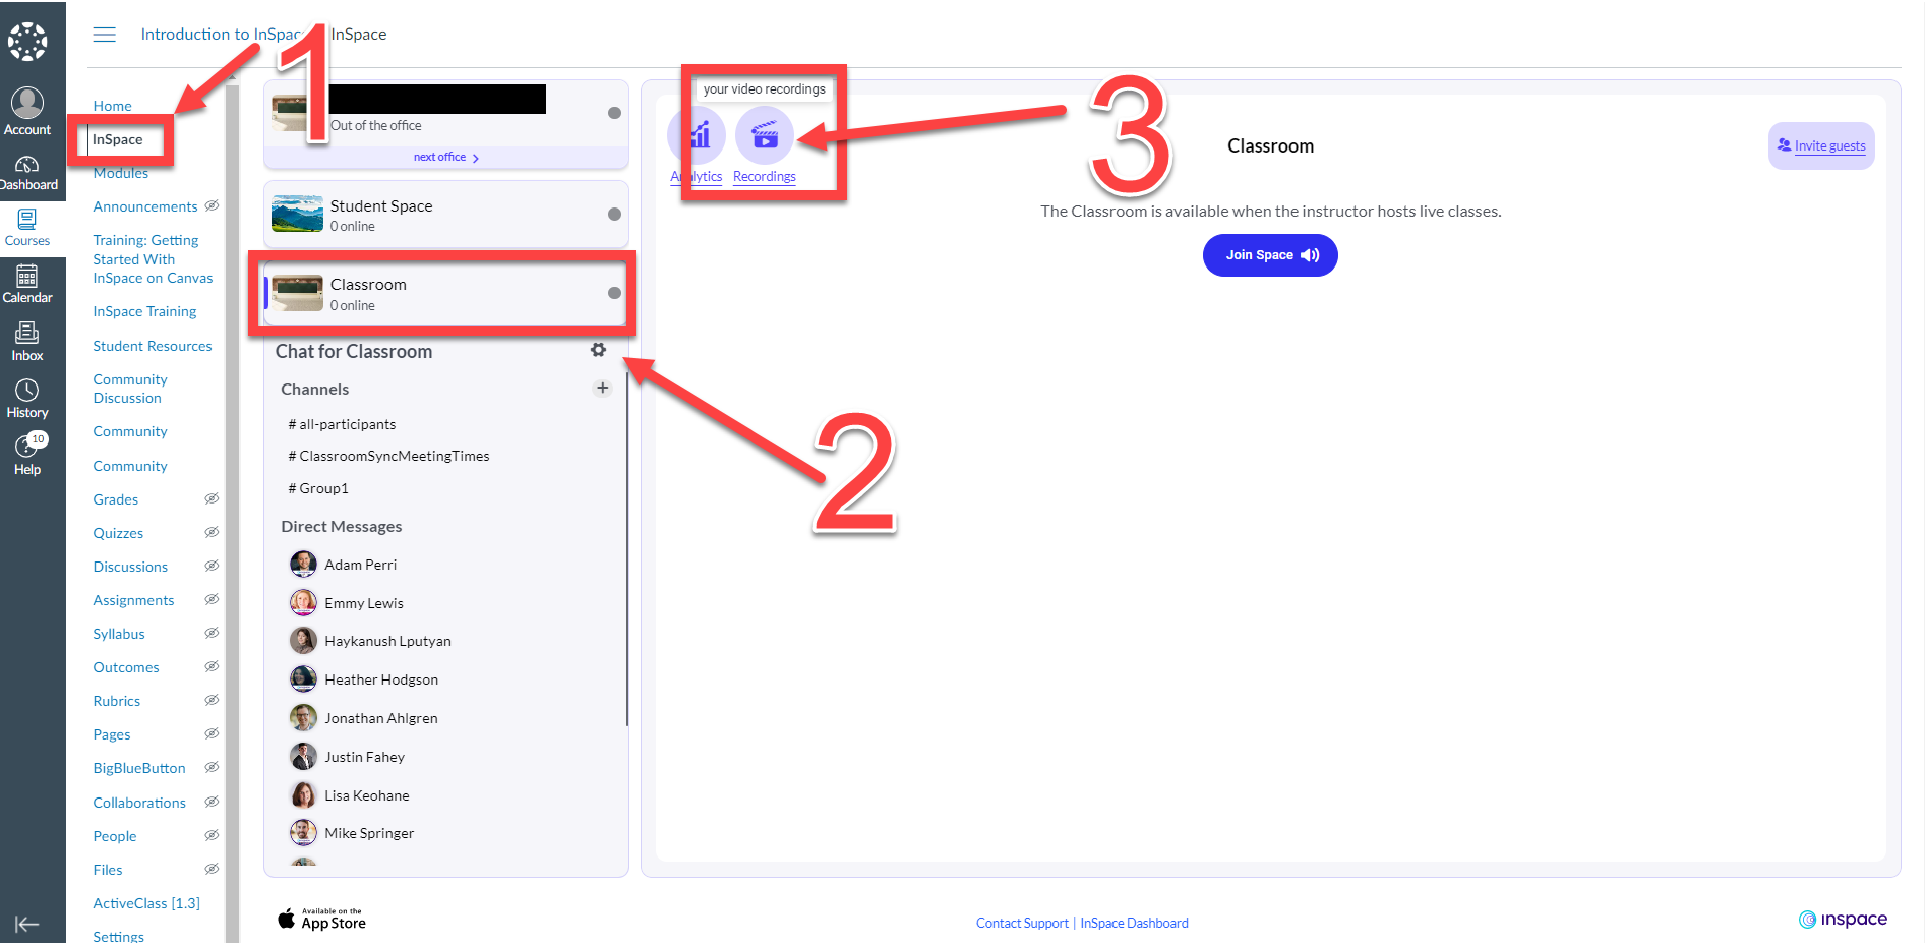
3b. (optional) If you are using the InSpace LTI Integration, recordings will save to your Dashboard and your LMS Video Recordings Library. From the InSpace LTI Integration for Canvas, Blackboard, D2L, or Moodle, click the "Recordings" icon.
4. Click on the Download icon on any recording to access the MP4 (Audio & Video) and VTT (audio transcript) files for download.